Monday, August 18, 2014

So Very Loved

Happy Monday everyone!  

I blinked and half of August was GONE.  Not sure where it went...if you find it, can you please let me know??  My daughter starts 7th grade -- 7th GRADE!!! Yikes! -- and my son begins his adventure in Kindergarten in one short week.  

So...it was extra wonderful to find and scrap the photo of me with them over 5 years ago that I'm about to share with you.


I purposely left a lot of white space on this layout...every time I tried adding something, it just cluttered it and didn't work.  This layout is based on a sketch by Brenshevia with Let's Get Sketchy:


I started with a base of textured white cardstock and chose the Basic Grey RSVP collection to bring in the purple, pink, and yellow we are wearing in the photo.  I love this paper...but I'm super-biased towards purple.  It's my happy color!!

I chose the papers that would trim the slanted header first, and then I planned out the papers to mat my photo.  I adhered the header papers first (flipped from the sketch) and included a sewn embellishment to top it (the banner is from the RSVP collection and the scalloped one with the 3D heart I made myself):


Once I had the header down, I put the photo mat papers down and double-sewed around the edges with purple thread.  I matted my photo with textured white cardstock and adhered my photo over the sewn mat.
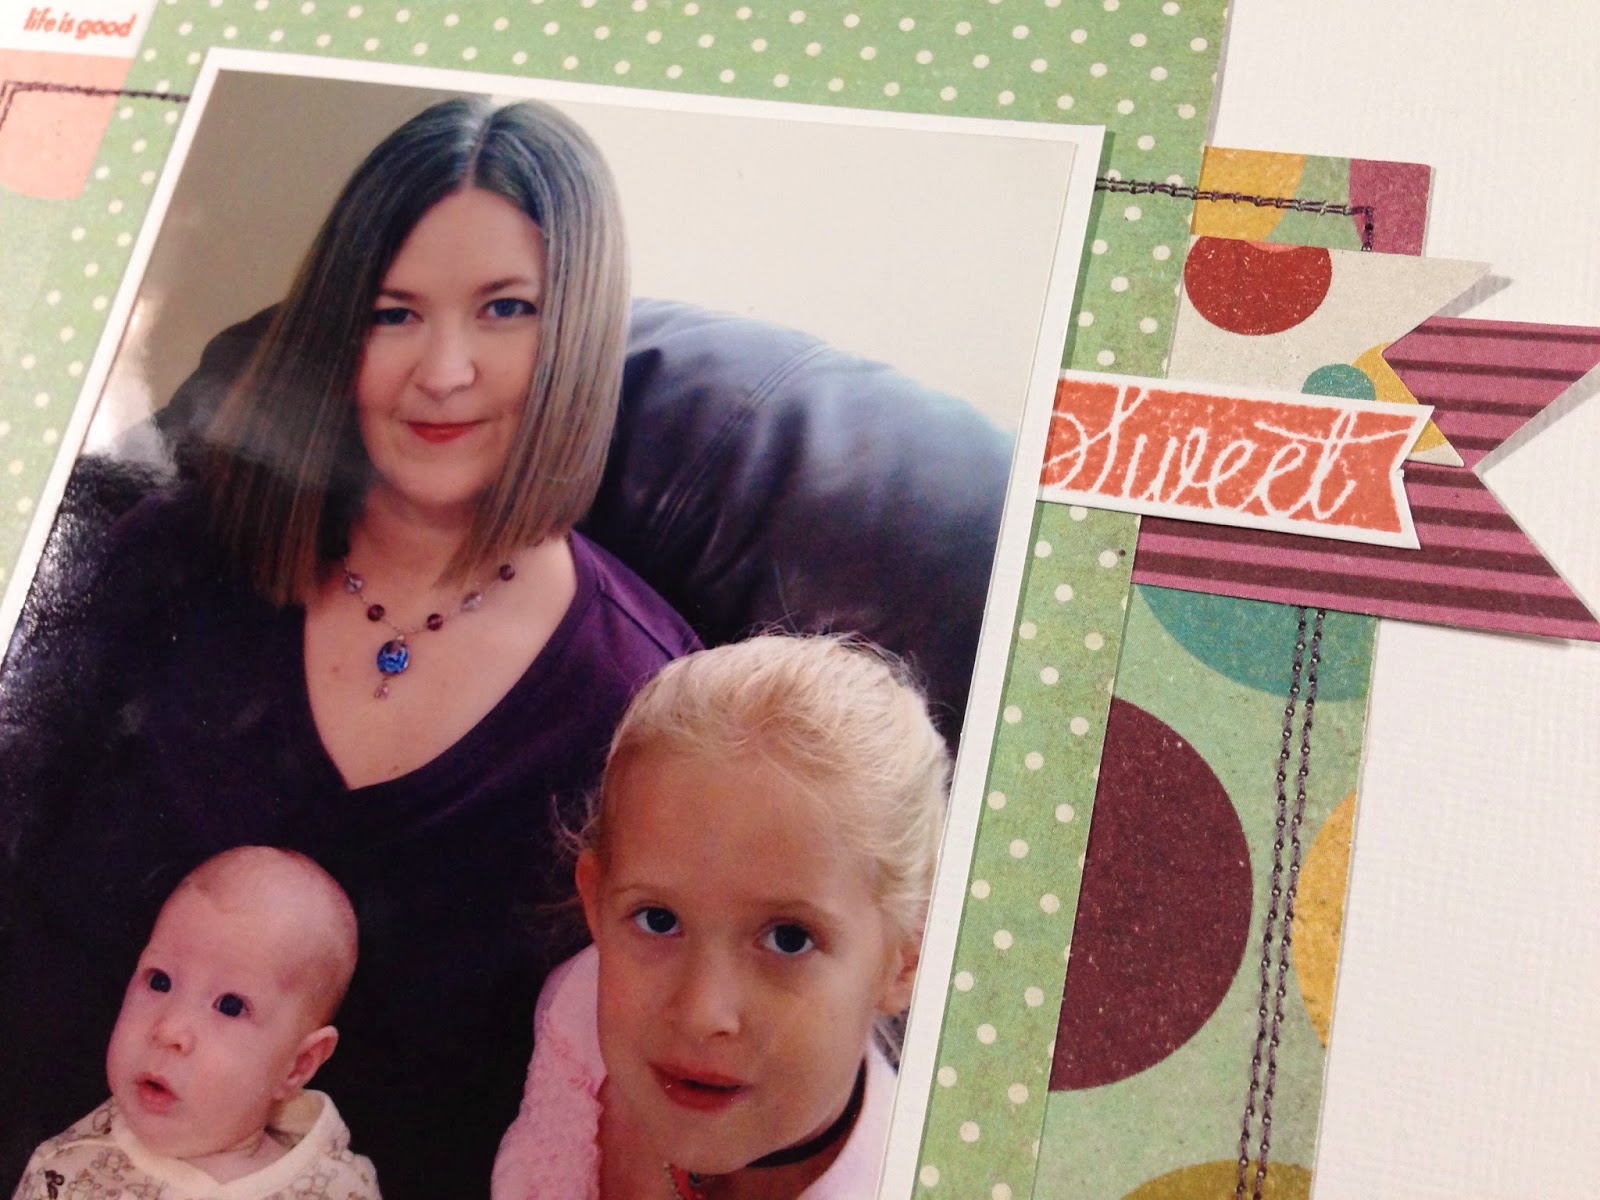

I decided to add some banners around my photo to add some dimension.  Finally, I created my title using Basic Grey stickers for the "so" and my Cameo for the "loved".  I used the Mama Elephant Inline Letters dies for the "VERY".  I wanted "VERY" to have dimension as well, so I die cut 4 "VERY"s in white cardstock and glued them together to create a chipboard look.  Then I cut the VERY using the dark green paper from RSVP and glued it on top.  


And then I added my journaling, a little heart, and a few gems!

I hope you liked this layout and get a chance to create based on this sketch...if you do, I'd love you to share it with me in the comments.

Have a great week!  Chocolate hugs,
Majken

Sunday, August 10, 2014

Silhouette PixScan Calibration Tutorial for Cameo

Hello everyone!  Today I want to share with you some things I learned as I set up my Cameo to use the new PixScan cutting mat this weekend.  I think these tips will help you if you plan on using this new cutting mat and a camera (instead of a scanner).  Visit the following tutorials on using your PixScan once you've set yours up:


So, here's what you need:
The first thing you need to do after getting the new version of Studio is to click on the PixScan icon:


The PixScan area will show up with the PixScan menu area on the right-hand side.  Click on the arrow to the left of "Import from File".  Ignore my stamped images for now :)...


You will see the Camera Calibration area:


Click on the arrow to the left of "Camera Calibration" and click on "Show Calibration Test Card".


This will populate a dotted sheet in the drawing area:


You need to print this sheet out.  Now, when I printed it, there were a couple of rows that had dots not evenly spaced and it looked like my printer had messed up.  But I printed it out on another printer and it was the same, so I decided to try it.

Your next step is to place the printed calibration sheet onto the PixScan mat and then take a picture using the camera you wish to calibrate.  Make sure you are on a flat surface and you take the photo as straight-on as possible.

Important!  For this step, you next need to go into your photo and crop it so that the photo is ONLY the dotted area (no mat or anything else included in the photo)...note: it doesn't have to be the COMPLETE dotted area -- it can be a portion.  BUT -- and this is important (and I learned the hard way) -- you must crop this in the same aspect ratio as your camera takes photos or it will not calibrate correctly.

Once you've cropped the calibration sheet and saved it on your computer, click on the plus sign in the bottom right of the calibration area:


and navigate to and choose your calibration file when the window opens.

Once you open it, Silhouette will begin calibrating.  If there's problems with the calibration, it will tell you what may be wrong (and you may have to take a new photo of the calibration sheet on the PixScan mat).  If it's successful, you will see your profile pop up.  Modify if you want (I put my name at the beginning of the profile), and then save the profile.

Now you are ready to use the PixScan mat!  I tested it using a few stamped images.  First take a photo of your images on the PixScan mat.  For this, you have to make sure your image shows the full PixScan mat with the images.  It should be on a flat surface, and you should try to take the photo straight-on (or as close as possible).

Here's what mine looked like:


And it didn't matter that it was rotated sideways and had extra stuff beyond the PixScan mat!  So click on "Import PixScan Image from File":


Choose your image file and hit "Open".  Silhouette Studio will process the image, and then you will see a screen like this on the right:


And like this in the drawing area:


You are now ready to choose the images, trace the edges, and cut as you normally would! It's very important that you don't move the images on the PixScan mat after you have imported the photo because the cut won't be accurate if the placement has shifted on the mat.

I hope you found this tutorial useful...I've been having a lot of fun with it and am so happy for this new feature!

Have a great, crafty week,
Majken

Tuesday, July 29, 2014

Practical Scrappers Christmas in July Blog Hop Giveaway Winner!

Hello friends!

Thanks so much for hopping along with Practical Scrappers as well as the comments for my "Believe" Christmas in July layout!

Today is winner announcement day! There were some awesome projects in the hop, so if you missed it, go here.

Today's winner was chosen using the wonderful random.org, and #1 is the winner! 


Scrolling down to the 1st comment, the winner of the $15 e-gift certificate to A Cherry on Top is Jackie George!


Congratulations Jackie!  Please email me at majkenmarie at yahoo dot com to claim your e-gift certificate!  You have until midnight Central time on Friday, August 1, 2014 to claim your prize.

Thank you to all who participated, commented, and joined my blog...I truly appreciate followers and comments as I build this scrappy world.  :)

Friday, July 25, 2014

{Believe} - Practical Scrappers "Scrap Our Stash" Blog Hop with Giveaway


Hi everyone and welcome back for another Practical Scrappers Scrapping Our Stash blog hop!  I love the blog hops -- there's always so many lovely projects to see.  This month is no exception with our Christmas in July theme!  Visit the Practical Scrappers page if you want to start at the beginning or you've lost your place.  You should have come from Brenda's blog.  See my project below and don't forget to enter my giveaway!

My project today is a Christmas layout.  I loved the Fancy Pants Designs "Tradition" collection when I purchased it back in 2010, and I still love it!  Such rich colors.


To create my layout, I was inspired by the My Mind's Eye June sketch.  I knew my layout background would be the distressed dark brown paper (Tradition Cards)....so beautiful!  To create a nice shimmer on the paper, I mixed CTMH Create-a-Shade Pearl paint, some Heidi Swapp Color Shine Bronzer, and some CTMH Chocolate re-inker to shade the pearl.  Then I just painted some on.

Next I chose the red "Holiday Sentiments" paper to use as the background for my photos.  I distressed the large rectangle, and then trimmed and matted the photos with green "Trim the Tree" paper.

Next up was "trimming" my rectangle with various Christmas-themed shapes and papers using my Cricut and CTMH Art Philosophy cartridge.  You can see the shimmer paint and some of the trimming below.  I decorated the ornaments with gems, gold twine, and sequins.


Then I created a journal area to include below the trimmed area.  You can really see the shimmer below.


To complete my layout, I placed gold alpha stickers to create "Believe", framed it, and popped up using 3D tape, and then created a paper "bow" to put in the top left corner to balance the layout.


I hope you are enjoying a touch of Christmas in July!

***GIVEAWAY TIME!***
  
I'm giving away one $15 e-gift certificate to A Cherry on Top online store!  All you have to do is:
  1. Be or become a member of my blog with Google Friend Connect or Bloglovin AND
  2. Leave a comment on this blog post
Refer a friend who joins my blog for an extra chance (please note it in a 2nd comment or have the referral tell who referred them in a comment).

Easy, right?  You have until Monday, July 28, 2014 at noon CT to enter for your chance to win. International entries are fine.  I'll randomly choose one lucky winner and announce it here on my blog on Tuesday, July 29th.  Good luck, and thanks so much for joining my blog and referring your scrappy friends!

Next, head over to Lyne's blog to check out her project...I know you'll like it.

Have a fun, scrappy weekend.
Majken


Tuesday, July 15, 2014

Life is Good

Hey there everyone!  Happy Tuesday.  Is time flying for you like it is for me?  Part of me really wants the structure of the school year back, and part of me wants summer to stay. Then there's my son, who can't stop singing Christmas songs.  It's our own personal Christmas in July.  ;)

Today I'd like to share a layout I created about the three most important people in my life.  To capture my sweet and crazy family, I'm using the Fancy Pants Designs Burlap & Bouquets.  I had to have this collection as soon as I saw the sneak peaks!  These colors with the burlap just caught my eye.  I also wanted to use the My Scraps & More Sketch #86, and I put a circular twist on it.  Here's my layout:


Here is the sketch:


I made the focal area larger and circular and switched the photo and journaling areas. To start, I used black cardstock as my base and Colonial White on top of that, inking the edge with CTMH Juniper ink.  I fussycut the floral wreath from the "Floral Wreath" paper and positioned it to see where I wanted my sewn circles to go.  I sketched my circle lightly in pencil and then sewed circles using black and green thread.


Next, I played with the papers to see what I felt worked best.  I ended up using the bokeh paper on the bottom, then the dark pink "maze" looking pattern, the burlap pattern, and the green pattern.  I inked the edges of the bokeh paper and distressed the dark pink maze pattern for depth and texture.

Next, I decided to create some flowers of my own to complement the wreath.  I cut different sizes of scallop circles and flowers with my Big Kick, punches, and Cricut.  These distressed flowers are fun and easy to make!  I spritzed each with Pearl Glimmer Mist to moisten and give them a little shimmer.  I crumpled them up and then uncrumpled them.  Next, I layered them to get the effect I wanted and pierced each with a coordinating brad.  You can see one of my distressed flowers above the journal area:


To finish my layout, I included two banners using the gold paper to follow the sketch, tucked in a small decorative tag (which I replaced the original white string of with a piece of burlap string!), some label stickers (including the "Life is Good" title and the very cool Walt Whitman quote sticker on the top left of my layout), and sticker fundamentals.


I really am pleased with the way it all "turned out" (pardon the circle pun!), and I hope you do too!

I love comments and new followers, so I'd love to hear how you have turned a sketch circular.  

I hope you have a fabulous week!  

Chocolaty hugs,
Majken

Monday, July 7, 2014

Everyday Moments Make the Best Memories

Hi everyone!

If you have kids, then you know how frustrating it is when they bicker, fuss, and fight.  But the times when they exist in harmony?  Those are the best!  I took this cute snapshot of the kids last July when they were simply together watching television, listening to music, and enjoying each other.  I used the Simple Stories Homespun collection, which is so beautiful!  Check out my Homespun 2-page layout from April if you missed it.

So here's my layout!  Do you see what element I carried over from the 2-page layout from April?  :)


I didn't follow a sketch this time, but my inspiration for the design was this Page Maps sketch created for Back Porch Memories.  I liked the vertical paper on the left, but I only had 1 photo, so I improvised on my own after borrowing the vertical strip element.

I started with a piece of CTMH Colonial White cardstock and a thick strip of the flower paper from Homespun.  I messy-sewed along the right-hand side and then attached a piece of plaid chevron on the left-hand side.  I sewed just inside each edge of the chevron to create texture, and then capped the end with a red ribbon knot.


For the photo area, I used the wood paper as my base, inked the edge and layered the distressed heart paper.  I matted the photo using the grid paper, and included the "It's a wonderful life" banner tag underneath with 3D foam for dimension.  My journal spot is right underneath.


To create more interest around the photo, I used the yellow doily, the green heart, the red banner, and the "little moments" tag from the Bits & Pieces.  I also created an embellishment area in the top right using a thin strip of the flower paper, three hearts, and sewing.


Finally, I created the title by cutting out the words from one of the papers from the collection (popping them up with 3D foam) and cut "memories" using my Cameo.  

How have you used this pretty collection?  I'd love for you to share your projects in the comments!

I hope you have a great Monday and a great week, and I hope it includes a little bit of chocolate.  :)  Happy scrapping!

Majken

Thursday, July 3, 2014

Revisiting Independence Days Past

Howdy from Texas, y'all!  I hope you had a fun Canada Day or have a fun July 4th planned!  Other than mosquitos, I'm looking forward to watching the fireworks this year (we are finally not in a drought).  The kids enjoy them so much!  In that spirit, I'm skipping my normal TBT post.  Today's layout is a fun one celebrating my two monkeys on July 4th 2009 and 2010.  I used Echo Park's Independence Day Mini Theme:


I used a pagemaps sketch from the Scrapbook & Cards Today Summer sketches:


After layering the red stars and blue stripes paper, I sewed the rectangle in white and edged the left side of the red star paper in navy thread.  I matted the two photos with white cardstock with inked edges.  I cut two squares with coordinating paper and embellished them using the mini-theme's stickers, some wax thread, some buttons, and some enamel dots.  I added some knotted ribbon in navy and red.  I cut two little white banners to stamp the years on and matched with the appropriate photo.


I added a journal spot, and put a star with a red gem in the bottom right of the page.


I hope you have a great weekend planned and take some good photos documenting your own celebrations, large and small.  

Happy birthday, America!

Majken