Wednesday, April 30, 2014

#TBT {Precious Baby} - Creative Scrappers Sketch 266

Happy (almost) Thursday, y'all!  Today I'm back with another installment of my Throwback Thursday series where every other Thursday I will share either an older layout or a new rendition of an older layout.


Today is a new rendition of my baby girl's first day on planet Earth.  Sometimes I can think back and smell her new-baby smell...such a wonderful scent.  :)  Here is the original layout from 2002...not many embellishments...so much has changed in the scrapbooking world!


For the updated page, I used the Creative Scrappers #266 sketch.  So fun!!


Because I just adore My Mind's Eye, the circles on the Mildred "Today" Dots paper just really went hand-in-hand with the sketch!  Here is the full updated layout with my rendition of the sketch:


I started with my base of the MME Mildred paper.  I *love* the colors!  I also had a MME Now & Then Mildred 6x6 paper pad, so I used that extensively.  I first chose the stripe and small flower paper for my vertical strips, which I inked with CTMH Twilight ink and adhered.  I stitched along the right side of the flower paper.

I worked on the photo area next and chose two of the photos from my original three and matted them with vellum that I inked.  The photos were then matted on top of the pink heart paper inked in Smoothie, a piece of distressed pink and white flower paper, on top of the light green polka dot paper.  After I estimated my photo mat placement, I cut out a line of the circles from the Mildred paper that were to the left of the photo area and set them aside.  I matted the Mildred paper onto a plain piece of cardstock so the open circles would have a base.  I then stitched over the photo mat with dark green thread.


To complete the photo area, I used a strip of lace tape, some Smoothie ribbon, a gold heart cut from the MME paper, and a MME enamel dot.

Next up was taking the circles that I cut out and popping them up with 3D foam tape.  I used some Smoothie twine to drape along the circles.  I embellished along the circle/twine strip with cut out hearts, enamel dots, and sequins.


I wanted the title to be different from the original layout (the original title is "In the Hospital"...not so original!), and the word "precious" is really how I thought of my firstborn, so I kept the title simple.  I used CTMH alpha stamps and stamped on MME Now & Then Milo "This Week" paper.  I cut out "baby" individually and popped the letters up with 3D foam tape.


I know the sketch doesn't show a journal area, but I felt compelled to journal this important day.  I used a similar mat placement for the journaling as I did with the photos, bringing in the patterns from the vertical strips underneath the photo area.


Well, that's it for today's installment of TBT!  I hope you enjoyed the updated look as much as I do.  :)  TBT returns in two weeks...and don't forget to view TBT #1 if you missed it.

Enjoy some chocolate today...happy scrapping!

Majken

Tuesday, April 29, 2014

Blog Hop Giveaway Winner!

Hello scrappy friends!

Today is winner announcement day for the Practical Scrappers blog hop that started Friday.  There were some awesome projects!  If you missed it, go here.

Today a winner was chosen using random.org, and #5 is the winner! Scrolling down to the 5th comment, the winner of the $15 e-gift certificate to My Scraps & More is:


SHartl


Congratulations SHartl!  Please email me at majkenmarie at yahoo dot com to claim your e-gift certificate!  You have until midnight Central time on Friday, May 2, 2014 to claim your prize.

Thank you to all who participated, commented, and joined my blog...I really appreciate it!  The next blog hop is scheduled for May 30th...so many projects, so little time!

Enjoy your day,
Majken 

Friday, April 25, 2014

On Trend: Bokeh

***Go here if you are looking for the April Practical Scrappers blog hop with GIVEAWAY.***

-----

Hello and happy Friday everyone!  I get a little twinkle in my eye - a little pep in my step - when Friday rolls around!  It always seems a little bit festive, even at work.  :)  

Today I have a project to showcase the Bokeh trend.  If you aren't sure what "bokeh" is, let's fix that!  Bokeh is a Japanese word that translates literally as "blur" and means "the visual quality of the out-of-focus areas of a photographic image, especially as rendered by a particular lens."  That effect you see when you take photos of your Christmas tree lights? That is bokeh.  Today I'll show you a quick way you can create that effect on paper -- no lens required!  So fun!


You will need only a few simple tools!

Paper
Circle punches, various sizes
Vellum
Spray Ink

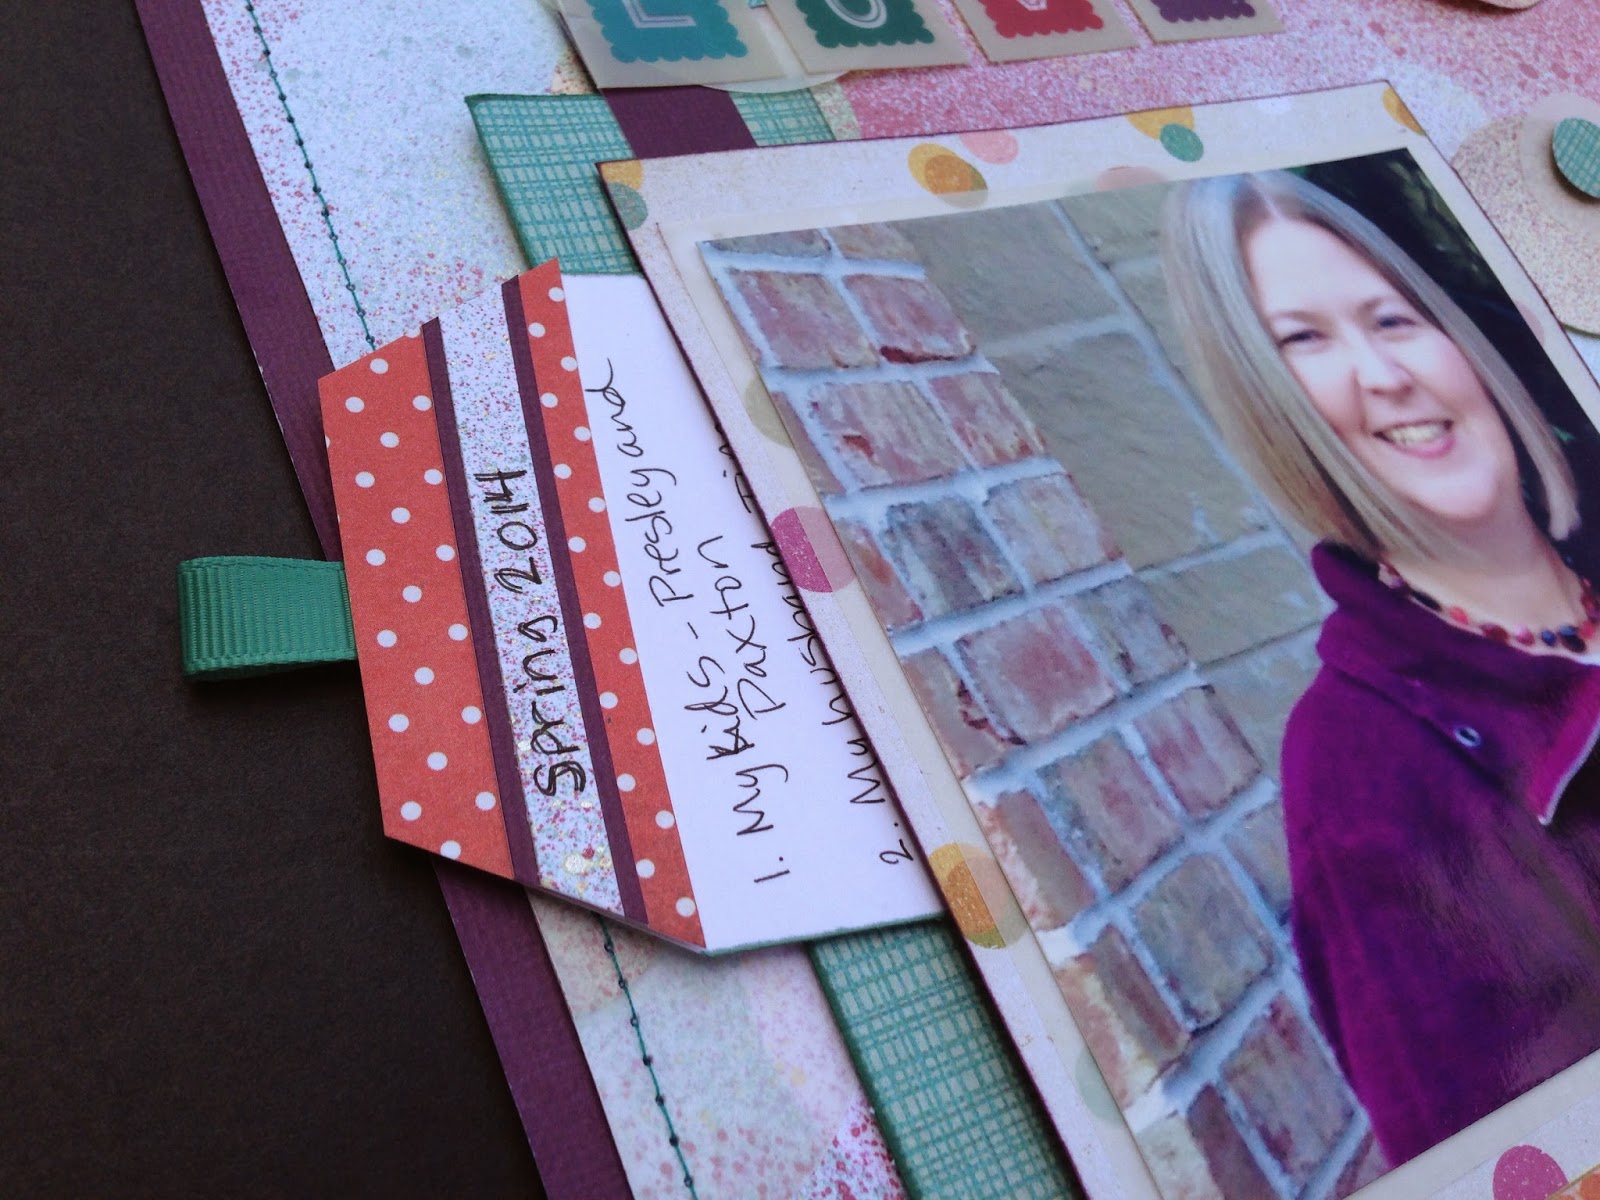
For this layout, I used the Basic Grey "RSVP" collection to create a layout about "Ten Things I Love".  (I love this collection...did you see my Cutie Pie layout using it?) I don't normally focus on myself, but I want to make sure some things about me are documented with my family's memories. 

I took a blank piece of Colonial White cardstock and trimmed it 1/2" on each side, layering it on top of purple cardstock.  I cut several circles in a few different sizes using Colonial White cardstock, patterned paper, and vellum.  I put the cardstock circles around the page in various places -- I overlapped some of them -- and spritzed with sunflower ink. After it dried, I moved the circles around and spritzed again with Juniper ink.  I repeated the process and spritzed last using Pansy Purple ink.  This gave me the base layer of spritzed circles.  Then I layered the spritzed cardstock circles and the vellum and patterned paper circles around the base page, popping a few up slightly with glue dots. 


I stitched around the edges of my layout, and then it was ready for my photo, also layered on vellum and bokeh patterned paper.  I created a journaling tag with my 10 favorite things to be hidden behind my photo.


Finally, I created the title using stamps, stickers, and acetate alphas. 


It really was easy, and I hope you try this technique.  If you do, I'd love you to share your project with me in the comments!

Check out the Practical Scrappers blog for other ideas for bokeh.

Please also enjoy the April Scrapping Our Stash blog hop, and have a happy, chocolate-filled Friday!

Majken

Scrapping Our Stash - Practical Scrappers Blog Hop {Giveaway!}


Welcome to the Practical Scrappers "Scrap Your Stash" blog hop.  You probably arrived from the blog of talented Alison Day.  Please enjoy my layout and then scroll down for a chance to win a GIVEAWAY! -- I'll also tell you where to hop to next.

This cool blog hop is all about using up our scrapbooking stash.  Which is AWESOME because I have collected enough paper to start a small store!  It's kind of neat, but also overwhelming because I want to buy all the new, cool collections.  

I am participating in the My Scraps & More April Sketchathon (so many sketches, so little time!) so today I used Sketch #8 created by Audrey Yeager.  With it was an additional challenge to use a 3x4 or 4x6 pocket-type card.  Here is my take on the sketch:


Here's the sketch:


I have been wanting to use a specific sheet of the American Crafts Dear Lizzy Day Dreamer collection ("Flying Kites" paper) for awhile.  I love the hearts on it, and it immediately came to mind when I saw this sketch.  I started with a base of textured white cardstock and splattered some gray paint on it.  Next I cut a large heart in Indian Corn Blue cardstock and a slightly smaller heart in vellum.  I layered them, trimmed the parts that were beyond the edge of the page, and stitched around the edges of both (leaving the trimmed side bare to include a hidden journal tag which I'll show you shortly).  

I layered my photo using some October Afternoon Sidewalks collection ("Paper Marbles" paper) and AC Amy Tan "Yes, Please" collection ("Commit" paper) as well as more ICB and white cardstock.  I distressed a couple of the pieces, and then I included a small embellishment cluster on the right bottom of the photo area.  (Presley's chubby cheeks make me smile *every* time!)


Next I fussycut some of the hearts from the Flying Kites paper to line up along the left of my photo.  I purposely left a couple of them inverted like they were in the paper, and then I stitched down the middle.


Next I cut two banners, layered them, and stitched a few times horizontally:


Finally, I created the title area using a 3x4 pocket card left over from a previous Scrapbook Circle kit.  Adding a small piece of the "Flying Kites" paper and the "Paper Marbles" paper, I stitched several times vertically along the edge and then adhered my title on top -- I stamped "forever" and cut "my girl" using my Cameo.  A few blue rhinestones were added at the end, too!


Here's my journal tag using another 3x4 pocket-type card with a pull-out tab made from bending some gray polka dot washi tape over the edge:


I hope you will share this if you were inspired by my rendition of the sketch.  :)  

Giveaway!
I'm giving away one $15 e-gift certificate to the My Scraps & More online store!

All you have to do is:

  1. Become a new member of my blog with Google Friend Connect or Bloglovin AND
  2. Leave a comment on this blog post 

You have until Monday, April 28, 2014 at 9am CT to enter for your chance to win. International entries are welcome. I will randomly choose one lucky winner and announce it here on my blog on Tuesday, April 29, 2014. Thanks so much for visiting!


Now head over to your next stop on the list, Cheryl Wegener Freet.

The full blog hop list if you'd like to start at the beginning.
Practical Scrappers http://practicalscrappers.blogspot.com 
Jennifer Haggerty http://livethemoment-jen.blogspot.com
Audrey Yeager http://audreysreflection.blogspot.com/
Lee-Anne Thornton http://lee-annelovethejourney.blogspot.com
Suzanna Lee http://lifestrivialities.typepad.com/

Monica Bradford http://scrapinspired.com
Brenda Ragsdale:  http://granddivasscrappyplace.blogspot.com/
Nicole Laha http://www.shezigzags.blogspot.com
Susie Bentz  http://mytime2play.blogspot.com/
Wendy Coffman: www.stampingrules.com
Erin Morehouse: http://girlpaperscissors.blogspot.com
Bobbi Smith: http://vintagemusedesigns.blogspot.com/
Wendi Robinson: http://scrappydayinparadise.blogspot.com/
Lisa Peeples: http://www.snappinandscrappin.blogspot.com/
Alison Day: http://alisondaydesigns.com/

***YOU ARE HERE*** Majken Pullin:  http://chocoscrapaholic.blogspot.com/  ***YOU ARE HERE***

Cheryl Wegener Freet http://patchesandscraps.blogspot.com
Laura Cox:  http://scrapaddict4life.blogspot.com/
Christine Meyer: http://scrappingwithchristine.blogspot.com
Kerri Yarus: http://kerrikr8tions.blogspot.com


Tuesday, April 22, 2014

{LOVE} Blocks

Hello everyone!  Today I wanted to share with you some altered chipboard cubes that I spruced up using My Mind's Eye Now & Then "Mildred" 6x6 paper pad.  I love the colors, the varied patterns, and the quality texture of these papers!  Here are my blocks:


Each cube side is 2" x 2".  I flipped through the paper pad and chose the large polka dot paper for my front (where I planned to stamp "LOVE") and framed it with the coral pink small polka dot paper.  I inked all smaller square edges with CTMH Ponderosa Pine ink and all large square edges using CTMH Smoothie ink.  I varied each side of the cube with different papers.  Here is a look at the back of the "L" cube:


I love that green chevron paper!  Here are the other cubes:


I stamped the LOVE in Smoothie using CTMH C1548, which came with the Canvas Frame last year.  I topped each cube with a small embellishment from my stash.  I liked bringing out the gold in the collection with the oversized brad and gold hemp on top of the "E" cube.  For the brad, I simply bent the brad prongs back and forth until they broke off so I wouldn't have to punch a hole through the cube.  


I hope you enjoyed my altered art today.  It was nice to create something different from a regular layout, and this is a great way to use 6x6 paper pads.  It would work with scraps, too!  

Have you created any decorative pieces lately?  I'd love you to share them with me!

Thanks for stopping by.  :)

Majken

Thursday, April 17, 2014

#TBT - Paxton's Fourth Birthday {Celebrate}

It's Throwback Thursday, y'all!  I'm starting a new feature on my blog.  Every other Thursday I will share either an older layout or a new rendition of an older layout (I have a lot of pages that were done in the late 90s that I'm itching to re-do!).  I hope you enjoy this new feature.

Today's layout is only going back about 18 months to my son's fourth birthday.  I love this layout because a) it uses a My Mind's Eye collection (Boy Crazy), 2) it's simple yet polished, and c) it is a My Mind's Eye collection (oh, did I already say that??).  Here's the 2-page layout:


I knew the photos were colorful, so I opted to use the grid paper for my background, and I double-stitched around the grid using a non-straight stitch with a zig-zag stitch in some places.  I crossed the corners to stitch to the ends of the papers -- I think the effect is cool.


I layered the star papers and some of the Studio Calico Darling Dear chevron vellum as the mat for the photos.  I distressed the blue star paper for more dimension and used my Tim Holtz Tiny Attacher for stapling the vellum to the page.  I fussycut some chevrons from the chevron papers to stitch in the top left and bottom right of my layout.


I cut stars and adhered flat to the page, and I also cut some of the papers to make chipboard stars.  Some punched bursts, a tab for journaling, a stamped "celebrate", and enamel dots finish the layout.


I hope you enjoyed our short journey back in time!  Come back in two weeks to see a TBT layout that's seen a much-needed "take 2"!

Have a wonderful day,
Majken

Friday, April 11, 2014

Amazing * Wild * Rad

Hello everyone!

I'm back for two in a row - woohoo!  I recently completed a layout of my son's visit to the park using a sketch #75 from My Scraps & More.  As soon as I saw Bella Blvd's Max collection, I HAD to have it for my son.  It has camouflage, sharks, skulls and crossbones, and more.  And my son adores his camouflage shorts.  Like, seriously.  The other thing he adores?  His cowboy boots that recently *fell apart* because he wore them so much.  Here's my Amazing-Wild-Rad boy:


It's based off this MSAM sketch:


The grid is so cool!  As soon as I saw the sketch and looked through the Max papers, I knew the black paper with the words was going to be part of the grid and my title.  I cut out the Amazing Wild Rad section and paired it with a camouflage strip to be the other part of my grid divider.  After trimming to create arrows, I stitched along the middle in orange thread.

I had three photos, so I trimmed them and left the bottom left square as an embellishment using the star patterned paper.  I inked the square in Sunset ink and doodled along the inside edge.  I covered a chipboard star in the speech bubble paper to give more dimension.  I stamped "a good day" in Olive ink underneath and adhered some stars to the bottom left side of the square.


The top left of the grid uses the striped paper that I cut a frame from.  I inked along the inside edge of the frame to help define the photo and adhered a green star from the Max sticker sheet on the bump of the frame.  I included a black button with orange twine in the center of the star.  Next, I stamped arrows in Olive ink to the left of the photo.  I cut a square from the speech bubble paper and cut diagonally in half to use as a corner, then stitched the edge.


The photo in the top right section of the grid was inked with black Stazon along the edges for definition and layered on the orange guitar paper.  I glued a wooden arrow, the "i do love you" tab, the phrase sticker, and two stars to embellish this section.


The photo in the final section, the bottom right grid, was also outlined in black Stazon ink and matted with the blue chevron paper.  I inked the edges of the "#AWESOME" sticker and put that above arrows stamped with Sunset ink.  My journaling is below this photo.


Simple yet detailed is how I'd describe this sketch and layout.  I had so much fun creating it, and I can't wait to use more MSAM sketches!  They put out a few each month, so don't forget to check them out, use them, and link them up yourself!

Have a super weekend everyone!

Majken